Social Icons

Showing posts with label ubuntu 16.04 LTS. Show all posts

Saturday, February 01, 2020

DOCKER INSTALLATION IN UBUNTU 16.04 LTS :

Will keep it simple to the point.....terminal commands to install docker and see it running in 6 commands as below :

curl -fsSL https://download.docker.com/linux/ubuntu/gpg | sudo apt-key add 

sudo add-apt-repository "deb [arch=amd64] https://download.docker.com/linux/ubuntu $(lsb_release -cs) stable"

sudo apt-get update

apt-cache policy docker-ce

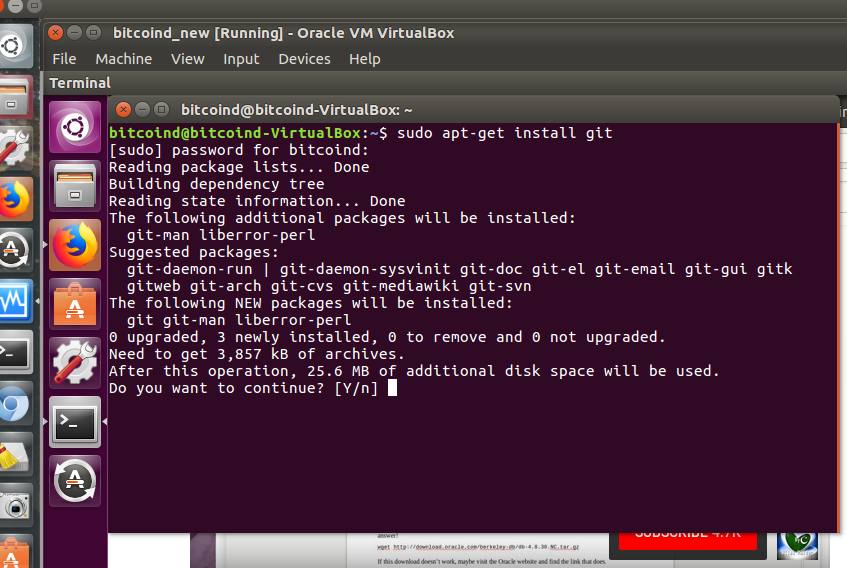
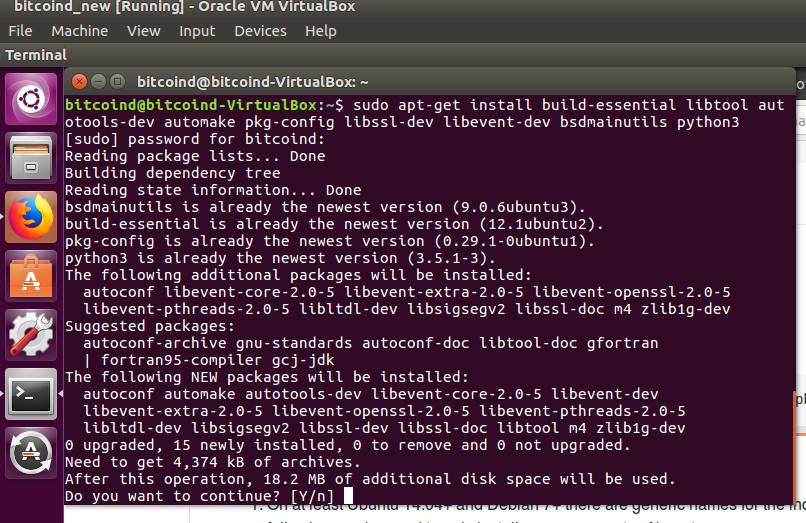
sudo apt-get install -y docker-ce


sudo systemctl status docker

Sunday, December 08, 2019

ganache-cli : installation error Unexpected token { [SOLVED]

If you are here to resolve the following error while installing ganache-cli

/usr/local/lib/node_modules/ganache-cli/cli.js:8
var {toChecksumAddress, BN} = require("ethereumjs-util");
    ^

SyntaxError: Unexpected token {
    at exports.runInThisContext (vm.js:53:16)
    at Module._compile (module.js:374:25)
    at Object.Module._extensions..js (module.js:417:10)
    at Module.load (module.js:344:32)
    at Function.Module._load (module.js:301:12)
    at Function.Module.runMain (module.js:442:10)
    at startup (node.js:136:18)
    at node.js:966:3


The following commands will resolve this as follows :

sudo apt-get install curl python-software-properties
sudo apt-get update
sudo apt-get install curl
curl -sL https://deb.nodesource.com/setup_10.x | sudo -E bash -
sudo apt-get install -y nodejs


Node.js Installation on Ubuntu 16.04

In this post I am sharing few commands to install Node.js & npm installation on Ubuntu 16.04 LTS

sudo apt-get install nodejs
sudo apt-get install npm
nodejs -v

The last command gives the installed version as seen in the screen shot below :


Friday, March 30, 2018

Compiling Bitcoin Core Source Code : Ubuntu 16.04 LTS


1.   Bitcoin Core is the reference implementation of bitcoin and anyone ON with any projects around bitcoin would need to compile the bitcoin source code to create the bitcoind for his/her own node. Ubuntu is usually the operating system recommended to run Bitcoin Core.This post will build upon with screenshots as done and terminal commands as executed to compile the same vide GIT.

2.  The machine I have used here is a Ubuntu 64 bit running on a virtual box platform with the following details as seen in the screenshot :

Now on I will just share the terminal commands as i executed in the terminal :

sudo apt-get update

sudo apt-get upgrade


sudo apt-get install git


Search for Bitcoin github and click the first link as seen below :


Goto the link as seen below at https://github.com/bitcoin/bitcoin/blob/master/doc/build-unix.md


sudo git clone https://github.com/bitcoin/bitcoin.git


sudo apt-get install build-essential libtool autotools-dev automake pkg-config libssl-dev libevent-dev bsdmainutils python3


sudo apt-get install libboost-system-dev libboost-filesystem-dev libboost-chrono-dev libboost-program-options-dev libboost-test-dev libboost-thread-dev


sudo apt-get install libboost-all-dev


sudo apt-get install software-properties-common


sudo add-apt-repository ppa:bitcoin/bitcoin


sudo apt-get update


sudo apt-get install libdb4.8-dev libdb4.8++-dev


sudo apt-get install libminiupnpc-dev


sudo apt-get install libzmq3-dev


sudo apt-get install libqt5gui5 libqt5core5a libqt5dbus5 qttools5-dev qttools5-dev-tools libprotobuf-dev protobuf-compiler


sudo apt-get install libqrencode-dev


sudo ./autogen.sh


sudo ./configure --disable-wallet #


sudo make

and the last command

sudo make install


....and you r ready to go.....

Saturday, March 24, 2018

The MIST Browser : Installation UBUNTU 16.04 LTS

Mist Browser (formerly Ethereum Dapp Browser) is the end-user interface for Ethereum. It's the tool of choice for browsing and using Dapps and is specifically designed for non-technical users.The following post shows a series of screen shots to install the same on UBUNTU 16.04 LTS.Zoom in the screen shots to see the details as desired please. Link at
https://github.com/ethereum/mist/releases


Sunday, July 23, 2017

Kali Linux 2 : Installing and Setting up OPENVAS

1.     This post will be useful for users who have just installed Kali Linux 2 and wish to install and setup OPENVAS.OpenVAS is a framework of several services and tools offering a comprehensive and powerful vulnerability scanning and vulnerability management solution. The framework is part of GreenBone Networks commercial vulnerability management solution from which developments are contributed to the Open Source community since 2009. 

 2.   The following set of commands vide a Kali terminal will be in the following sequence :

:~ apt-get update
:~ apt-get -y upgrade
:~ apt-get install openvas
:~ openvas-check-setup

after you run the open-check-setup command ,there is a possibility of something going wrong during installation...if there are some errors ...do the following at the terminal

:~ openvasmd --rebuild

next you might be prompted to create a user

:~ openvasmd --create-user= --role=Admin && openvasmd --user= --new-password=yourpassword

:~ greenbone-certdata-sync

Run the check setup again :

:~ openvas-check-setup


 the check setup screen should look like below :

 Final step to the access will need to browse you at the link as below to access Greenbone web interface

https://localhost:9392


 Thats all...start exploring the interface

Monday, May 30, 2016

VMware Workstation Player installation @UBUNTU 16.04 LTS

 1.    VMware Workstation Player is a virtualization software package for x64 computers running Microsoft Windows or Linux, supplied free of charge by VMware, Inc. VMware Player can run existing virtual appliances and create its own virtual machines and uses the same virtualization core as VMware Workstation, a similar program with more features, but not free of charge. VMware Player is available for personal non-commercial use, or for distribution or other use by written agreement. VMware, Inc. does not formally support Player, but there is an active community website for discussing and resolving issues, and a knowledge base.

2.   This post brings out few steps with screenshots and source details of download for the VMWare workstation version for Linux. The bundle package can be downloaded at https://my.vmware.com/en/web/vmware/free#desktop_end_user_computing/vmware_workstation_player/12_0

3.   The file I downloaded from the above link is 

VMware-Player-12.1.1-3770994.x86_64.bundle

4.   Few steps to install this file further involves going to the terminal and executing the following commands :

chmod a+x VMware-Player-12.1.1-3770994.x86_64.bundle

the next step

sudo ./VMware-Player-12.1.1-3770994.x86_64.bundle

 this is followed with the following gui shots :


Ready to roll..........

Powered By Blogger