Social Icons

Showing posts with label Open source. Show all posts

Wednesday, April 29, 2020

Reset Ubuntu 18.04 LTS to original state

Invariably for Ubuntu users there are times when there is a need felt to get back to the original state of Ubuntu as it was at the time of fresh install.This post shares steps and screen shots to achieve the same with the help of a small tool known as RESETTER.


- After download,just double click the file which is most likely downloaded in the Downloads folder unless otherwise configured.

After double clicking it will take few minutes to install.

After installing just go to the terminal and type sudo resetter

That's all...the above steps have been shown below as screen shots..step wise

The site from where the file to be downloaded named resetter_3.0.0-stable_all.deb
 File seen in the downloads folder
 Double click the same and we get the software install notification window
 Installing after punching password as aksed

 At the terminal type sudo resetter
 There comes the resetter GUI...and u r ready to go
 Thanks

Saturday, November 02, 2019

HYPERLEDGER FABRIC ON UBUNTU 18.04 LTS : INSTALLATION STEPS WITH TERMINAL COMMANDS

Hyperledger is an umbrella project of open source blockchains and related tools, started in December 2015 by the Linux Foundation, and has received contributions from IBM, Intel and SAP Ariba, to support the collaborative development of blockchain-based distributed ledgers.The following post ahead will see through the screenshots and steps for installation of Hyperledger Fabric on Ubuntu 18.04 LTS. The installation basically first creates the required environs and then the actual installation of.

The actual terminal history I got after the installation is placed below.Between 11-13 terminal commands,if you get an error,please reboot and proceed.

    1  sudo apt-get update
    2  sudo apt-get install curl
    3  sudo dpkg --configure -a - i ran this owing to an error in between
    4  sudo apt-get install curl
    5  sudo apt --fix-broken install - i ran this owing to an error in between
    6  sudo apt-get install curl
    7  sudo apt-get install npm
    8  sudo apt-get install docker
    9  curl -fsSL https://download.docker.com/linux/ubuntu/gpg | sudo apt-key add -
   10  sudo add-apt-repository "deb [arch=amd64] https://download.docker.com/linux/ubuntu $(lsb_release -cs) stable"
   11  apt-cache policy docker-ce - might need a reboot if error seen
   12  sudo apt-get install -y docker-ce
   13  docker info
   14  sudo docker info
   15  sudo apt-get install -y docker-ce
   16  sudo apt-get install docker-compose
   17  sudo apt-get upgrade
   18  sudo curl -sSL https://goo.gl/6wtTN5 | sudo bash -s 1.1.0
   19  history
   20  sudo chmod 777 -R fabric-samples
   21  cd fabric-samples/first-network
   22  sudo ./byfn.sh generate
   23  sudo ./byfn.sh up


The following applications and software's need to be installed first for Hyperledger Fabric:

  • CURL
  • GO Programming Language
  • Docker
  • Docker Compose
  • Node.js Runtime
  • NPM
  • PYTHON

The following is the set of commands used for the entire installation.These commands are followed by the respective screen shots of the executed commands.


So...all good and the fabric is installed...

Sunday, September 22, 2019

Installation Cupcarbon : Smart City and Internet of Things Wireless Sensor Network simulator

1.    CupCarbon is a Smart City and Internet of Things Wireless Sensor Network (SCI-WSN) simulator. Its objective is to design, visualize,debug and validate distributed algorithms for monitoring,environmental data collection, etc., and to create environmental scenarios such as fires, gas, mobiles, and generally within
educational and scientific projects. Not only it can help to visually explain the basic concepts of sensor networks and how they work; it also supports scientists to test their wireless topologies, protocols, etc.

2.   Although otherwise an easy installation,but with the Java changes effecting 16 Apr 2019 wherein the release of Oracle Java 8 update 211 / 212 – also known as Oracle’s first ‘not free for production use’ patchset,the installation instructions are little changed.

3.   This post will bring you simple set of commands executed with screenshots to run this awesome simulator CUPCARBON.The simulator is available for download at http://cupcarbon.com/download.html .

4.  Once downloaded the following commands will get you the desktop with cupcarbon running. My friend Ayaz helped me out in these.

$ sudo apt-get update
 $ sudo apt-get upgrade
 next we need to check if java is installed by checking the version by the following command :

$ java -version

If there is no java installed we need to install by typing the following :

$ sudo apt install openjdk-11-jre-headless
 Once installed check the output and we should get the following :

 Now we need to install javafx with the following command :

$ sudo apt install openjfx
 Once installed,we can query with the following command and get the expected output as seen below :
$ dpkg-query -L openjfx

/usr
/usr/share
/usr/share/doc
/usr/share/doc/openjfx
/usr/share/doc/openjfx/TODO.Debian
/usr/share/doc/openjfx/changelog.Debian.gz
/usr/share/doc/openjfx/copyright
/usr/share/openjfx
/usr/share/openjfx/lib
/usr/share/openjfx/lib/javafx.properties
/usr/share/openjfx/lib/javafx.base.jar
/usr/share/openjfx/lib/javafx.controls.jar
/usr/share/openjfx/lib/javafx.fxml.jar
/usr/share/openjfx/lib/javafx.graphics.jar
/usr/share/openjfx/lib/javafx.media.jar
/usr/share/openjfx/lib/javafx.swing.jar
/usr/share/openjfx/lib/javafx.web.jar

Now move to the location where you have downloaded the cupcarbon.jar file.Unzip the same and change the execution properties as

$ chmod +x cupcarbon.jar

Once done,we need to execute and run the carbon.jar file by defining the route and javafx

$ java --module-path /usr/share/openjfx/lib --add-modules=javafx.controls,javafx.fxml,javafx.base,javafx.media,javafx.web,javafx.swing -jar '/home/smartbuilding/Downloads/cupcarbon/CupCarbon/cupcarbon.jar'

Here in the above command you need to define and enter the path which is being used in ur PC.In my case the path is home/smartbuilding/Downloads/cupcarbon/CupCarbon/cupcarbon.jar

The above should run successfully and give you the below screen that runs the cupcarbon simulator


Thanks Ayaz bhai....for the inputs.He is available at https://ayaztechy.blogspot.com/

Sunday, May 29, 2016

Upgrading to Xenial Xerus 16.04 LTS Ubuntu from 15.10 : 3 Steps

1.   While most of us might already be satisfactorily running the Ubuntu 15.10 version, now when the LTS version is out,I am sharing here few steps to smoothly upgrade to the 16.04 LTS Version that's Xenial Xerus.

STEP 1

Check the present state of your OS if it is updated or not.
 Click on Install updates to ensure that you see the message System Up-to-Date
Step 2

- Open “Software & Updates” in Settings.
- Select the “Updates” tab in the window.
- Checkbox Pre-released updates as seen below in the shot below :
- Check “Notify me of a new Ubuntu version” to “For any new version”


 Step 3

Type the following command at the Terminal : sudo do-release-upgrade

 ...the following screens are seen whilst the upgrade.It takes about a while depending on your internet speed.Just wait till you see a message asking for reboot.
 Confirmation as seen below :

Sunday, March 27, 2016

OwnCloud Installation : Ubuntu 14.04 LTS

1.     OwnCloud is a suite of client-server software for creating file hosting services and using them. For those who have been traditionally hooked to the pirated copies of Windows Server Softwares or used to crashing regulars of MS Server 2008 or even 2012 and later,I would rate this suite much better w.r.t simplicity of installation,less of configuration issues and the best part being open-source with lots of options for the user.I got introduced to it via a friend Nagraj and have been percolating in my circle since.

2.     OwnCloud is functionally very similar to the widely used Dropbox, with the primary functional difference being that OwnCloud is free and open-source, and thereby allowing anyone to install and operate it without charge on a private server, with no limits on storage space (except for disk capacity or account quota) or the number of connected clients.This post will give a stepped screenshot for installing the same on a Ubuntu 14.04 LTS version machine.

3.    The installation ahead has been done in a Virtual environment(I used Virtual Box) with the following setup :

First Virtual Machine : Ubuntu 14.04 LTS 64 bit with 2 GB RAM.This machine will be installed with the Owncloud server part.

Second Virtual Machine : Windows 7/32 bit 2 GB .This machine will be used as the client part who will be able to access the own cloud via web interface.

Installation

Firstly , the ethernet settings that come default to a new machine in UBUNTU are seen below.We will configure this later during installation.
 As we see localhost which currently has been not configured,we see the following screen :

 Look for the mention of xUbuntu 14.04 as below :

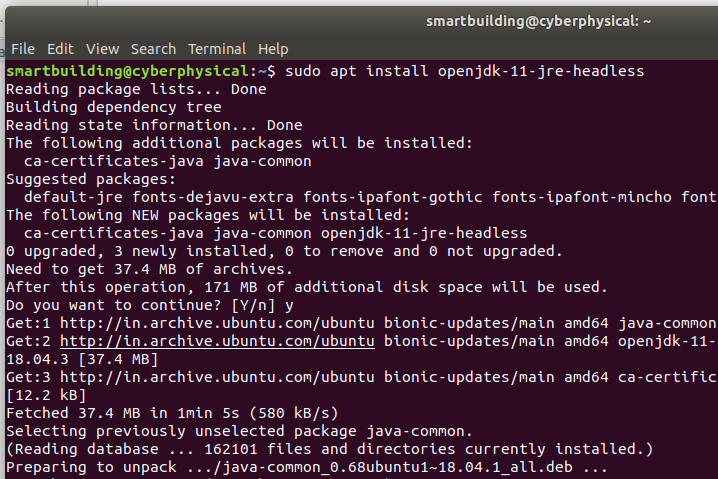
 Go to Terminal and type :

sudo sh -c "echo 'deb http://download.opensuse.org/repositories/isv:/ownCloud:/community/xUbuntu_14.04/ /' >> /etc/apt/sources.list.d/owncloud.list"

 sudo apt-get update
wget http://download.opensuse.org/repositories/isv:ownCloud:community/xUbuntu_14.04/Release.key
 sudo apt-key add - < Release.key
 sudo apt-get install owncloud
 ...as it fetches,the screen keeps showing you thousands of lines of terminal commands being executed as below :
 the screen prompts for a root user sql password as below :
 continues installation part...
 and finally the screen scroll gets over with the installation and is seen like this :
Check the local host and u get this screen showing the Apache2 Ubuntu default page.
 and then you type at the web address : localhost/owncloud and you get the screen as below :
 Click storage and database link below the login
 Enter the sql root user and password as set earlier and click Finish setup and you get the successful login interface of admin as below :

 Meanwhile lets configure the network settings as below in the Ubuntu machine :
 The windows client networking addresses are configured as below :
 The network addresses for the Ubuntu machine are configured as below :
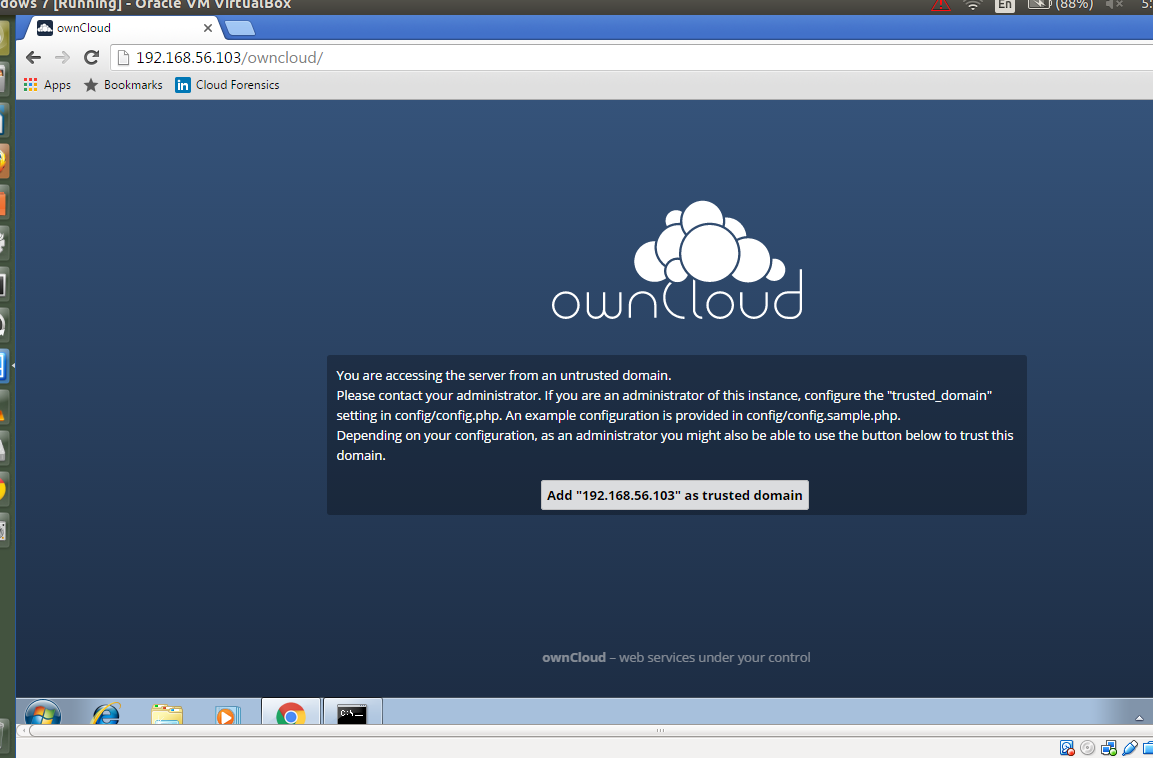
 Now from the client web browser ,try and access the server by typing the IP address/owncloud and you will likely get the following screen.
To resolve the issue we need to add this IP address in the trusted domain in the config.php file as seen below.The location of this config.php file is at /var/www/owncloud/config

 and you refresh the windows browser and you ready to go....

For any clarifications whilst installation you are free to comment here...reply assured asap. :-)
Powered By Blogger